
Tiles are an excellent choice for flooring due to their durability, beauty, and low maintenance. However, over time tiles can crack due to various reasons like heavy foot traffic, impact from dropped objects, or even temperature fluctuations. To maintain the aesthetics and functionality of your space, it’s essential to address these issues promptly. This blog post will provide you with some valuable tips and tricks for successful cracked tiles repair.
Assess the Damage
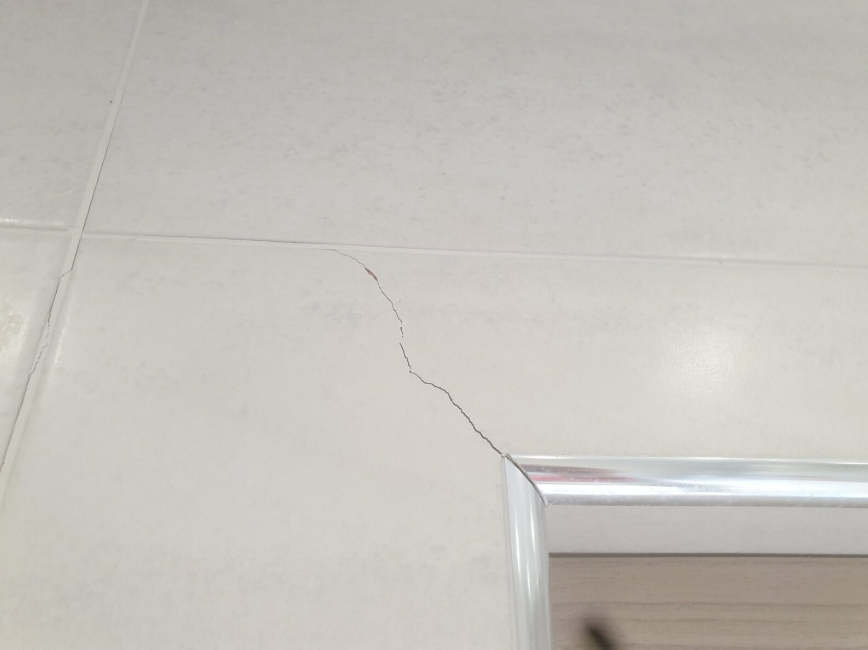
Before diving into the repair process, it’s crucial to assess the extent of the damage. Small hairline cracks might not require immediate attention, but larger cracks or broken pieces can become hazardous and should be fixed as soon as possible. It’s also important to determine the cause of the damage to prevent future issues.
Gather the Necessary Tools and Materials
For a successful cracked tiles repair project, gather the necessary tools and materials beforehand. You’ll need:
- A replacement tile (matching the existing ones)
- Tile adhesive
- Grout (matching the existing colour)
- Notched trowel
- Rubber mallet
- Grout float
- Sponge
- Bucket
- Tile spacers
Having these items readily available will ensure a smooth and efficient repair process.
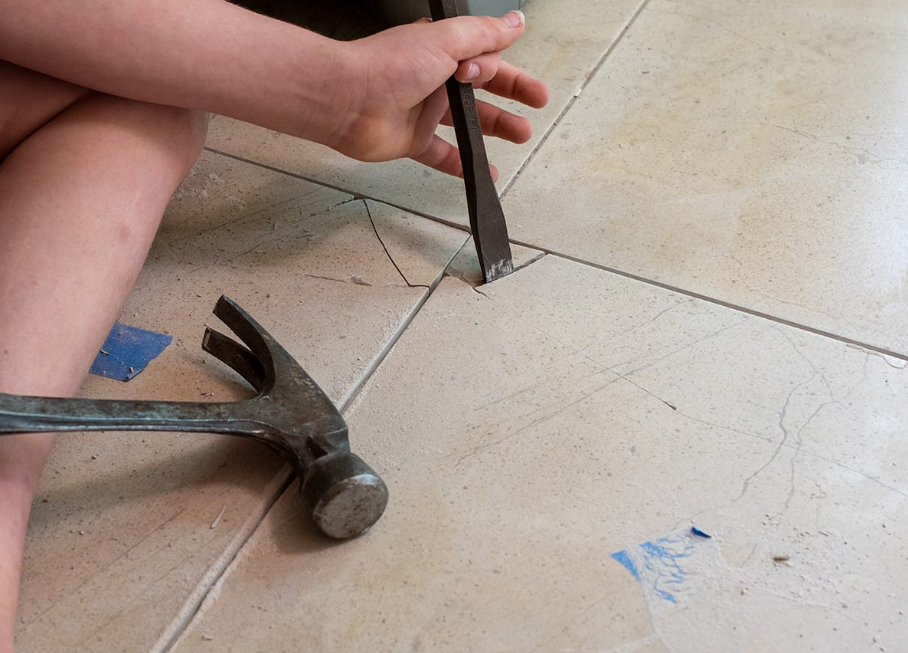
Remove the Damaged Tile & Prepare the Surface:
To begin the tile floor repair, carefully remove the damaged tile without causing further damage to the surrounding tiles. Once the damaged tile is removed, clean the area thoroughly to remove any remaining adhesive or grout. Ensure the surface is level and free of debris to provide a secure base for the new tile.
Install the Replacement Tile
Apply a generous amount of tile adhesive to the back of the replacement tile using a notched trowel. Press the tile firmly into place, ensuring it’s level with the surrounding tiles. Use tile spacers to maintain consistent spacing between the tiles. Allow the adhesive to dry according to the manufacturer’s instructions.
Apply Grout
After the adhesive has dried, mix the grout according to the package directions. Using a grout float, apply the grout to the joints around the new tile, pressing firmly to fill the gaps completely. Remove excess grout with the edge of the float and then use a damp sponge to clean the tile surface. Allow the grout repair to dry before walking to the repaired area.
Conclusion
Cracked tiles repair doesn’t have to be an intimidating task. With the right tools, materials, and a bit of patience, you can restore your tile floor to its former beauty. Don’t forget to address the cause of the damage to avoid further issues and keep your tile floors looking their best.